Showing posts with label Composting. Show all posts

Wednesday, December 27, 2017

MY FAVORITE 5 GARDEN PRODUCTS FOR SMALL SPACES

I love shopping online for cool garden products for my small space.  I really like the idea of buying something that is handmade and not mass produced.  These 5 online shops are my favorite that I recommend you check out.  Good for any small space gardener that wants to garden but has little room to do so. 

My first favorite is the worm compost bin by Sacred Resource:  This worm bin is great for those that don't have a lot of land to garden in and yet still want to compost.  I have the 3 tier bin in my 100 square feet patio.  I also like that it looks decorative and does not take up much room.  Perfect for any size garden.  You can even have this indoors. 

Second favorite is outdoor fabric by Fabric Supply CO.  This shop has a wide range of outdoor fabrics that are reasonably priced.  You can buy by the yard, which means that you are not limited to any quantity and can just buy what you need.  I bought the green/blue banana patterned fabric and love it.

Third favorite are mini woolly pockets.  What I love about these is that they are small and work well for any space.  I have two in my kitchen.  You can use these to grow herbs or any type of plant that suits your fancy.  They are made from 100% recycled water bottles.  Totally sustainable and very durable. 

My fourth favorite is the Greenbo railing planters.  These are awesome for condo/apartment dwellers that have no land to garden in and still want to garden.  I have 3 of the small size and one of the big in my 100 square feet patio.  This is a video I made about planting them. 

Fifth and final product love is a table and chairs set from Ikea.  This is great for small spaces and reasonably priced enough that if it gets damaged you won't feel bad.  You could even paint the wood some other color if you don't like its natural color. 

Friday, December 8, 2017

TOP 5 WAYS TO REDUCE YOUR WASTE

The holidays are nearing and it's easy to generate lots of waste and end up with things that you may not ever really have use for.  I would like to propose the idea of giving experiences rather than gifts.  Think about it...  Someone can give me a shirt for Christmas but I probably won't remember that in 5-10 years more than I will if that person gives me the gift of time and experiences.

Other things you can do to reduce your waste is to buy package free and locally as much as possible. Use materials that are better than the traditional toxic chemicals that are out there such as the ever so toxic Clorox.  Clorox products even smell toxic.  It bleaches nicely, but what bleaches even nicer and is non toxic is baking soda.  Instead of using a plastic toothbrush consider a bamboo.  There are many alternatives to the traditional toxic products we use.  Choose and think wisely.  This video goes into more detail.

Friday, May 13, 2016

MY PATIO GARDEN UPDATE

Previously I had done a post about my patio garden which you can read here, but I decided to do an update as some things have changed thanks for my HOA.

Let me tell you that if you live in an area with an HOA then you have some rules and regulations that you have to follow and if that is the case then you should read your CC&R'S.  I did not read mine and ended up getting a letter from the HOA informing me that I could not nail or screw anything to an exterior surface of my unit/building as the exterior walls are HOA property.  So I removed anything that was nailed or screwed.  I could have tried to fight this rule but I decided not to because while I was miffed about this rule, I was glad that the HOA is enforcing their rules.  One day I will buy a house in an area with no HOA but until then...


The three new plants I added to me garden are:

  • Penstemon heterophyllus 'Margarita' - Purple Penstemon
  • Salvia greggii 'White' - White Autumn Sage
  • Satureja douglassii - Yerba Buena

Monday, April 25, 2016

MY PATIO GARDEN - PART THREE

I had previously blogged about my patio garden and the design I created for it as well as my worm composter.  So today I thought I would do a quick video about the actual space that is 99% done.  I say 99% because every garden much live every interior space is a work in progress.  It evolves over time as seasons and tastes change.

Mine was interesting as I had only 100 square feet of space that is 100% concrete and some challenges such as a swinging gate door and walkability to the front door to tend with.

Overall I am very pleased with the space.  The only thing left to do is top dress the 3 raised beds which will be done in another blog post.


On a side note I am going to be doing more videos in relation to California native plants, gardening and some client projects.   Stay tuned for those as my goal is to post one video a week.

Here are some things that I have in my garden...

CA native plants - from Tree of Life Nursery:
Salvia clevelandii 'Japatul' - Japatul Cleveland Sage
Ceanothus 'Concha' - Ceanothus
Dudleya pulverulenta - Chalk Dudleya
Dudleya edulis - Dudleya
Dudleya Lanceolata - Lance Leafed Dudleya
Clarkia bottae - Farewell To Spring
Berlandiera lyrata - Chocolate Daisy

Edible plants - from Plant Depot:
Lettuce
Spinach
Parsley
Cilantro
Dill
Onion chive
Arugula

Planters:
Woolly Pockets
Raised beds from Ikea 
Greenbo railing planter

Composting:
Worm bin
Red Wiggler Worms

Accessories:
Home Goods
Cost Plus World Market
Craigslist

Wednesday, April 20, 2016

MY PATIO GARDEN - PART TWO

As you may have read in my patio garden part one I recently moved to Santa Ana from Tustin.  This meant that I was not only going to have a space that had a better layout and was energetically better but unlike my last place I now have a descent amount of garden space to play with.  I will do a video of the entire space in a future post.  What I wanted to talk about today is worms and why (if you have a garden) you should have them.

I for the past few years have been trying to live a more sustainable life.  Trying to reduce the amount of waste I produce and just live an all around healthier life.  So when I moved into this place I wanted to not be sending a shit ton of trash into the landfill.  I started years ago by not buying foods that came in any packaging that could not be recycled or reused.  I buy everything in bulk which was a cost savings but I was still throwing the food waste in the landfill and that had to change. So I decided to start worm composting.


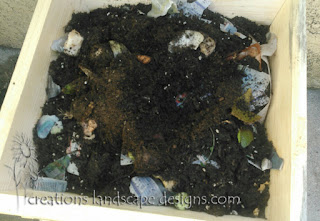
I did not want to go the plastic bin route and wanted something that was both functional and decorative.  After some google searching I found this wooden worm composting bin from an Etsy shop called Sacred Resource.  I was drawn to the fact that it was not made of plastic and is far more sustainable than the competition.  It was easy to install and I am certain that my HOA won't huff or puff about it.  I also got some worms (500 red wigglers) from Uncle Jim's Worm Farm.   Both products came with some tips and tricks to get started that were helpful.


So far it has been a few weeks since I have been composting and I have learned a few things...

  • Have a bucket in the kitchen to which you can store the food waste until you are ready to put them in the bin.  I bought one from World Market.  
  • Out of 500 worms about half a dozen died. 
  • Onion peels are not liked so much.
  • Avocado peels, tea leaves and tomato peels are a big hit.  
  • You really do need equal (or thereabouts) amount of green and brown waste or there will be an odor.
  • You may get some critters inside the bin.  I have some gnats and tiny ants.  I am sure they are harmless.  
  • Once in a while add a bit of water to the bin to keep the soil somewhat moist. 
I will share updates from time to time.  If you are worm composting I would love to hear about your adventures and if you have any tips for this newbie then feel free to share.

Monday, March 28, 2016

MY PATIO GARDEN - PART ONE

I recently sold my Tustin condo and bought another condo in Santa Ana.  This time unlike the last I have a patio (right picture) that I get to landscape.  Although the patio is in full sun with concrete (cannot be removed per HOA rules) at least it is a space that I can have planters in and whatnot.  For me being finally able to have my own garden is exciting and much like any other client I created a drawing so that I could see exactly how much space I have to work with.  The total area is 100 square feet.  Small with a lot of potential.

I started by measuring the space and digitally creating a site plan.  Then I (digitally) drew two options based on what I was looking for, budget and what would realistically work.  I also have a homeowners association, so I had to take into account their rules and guidelines (in my case it was not that bad).

In designing this space I knew that I wanted not only a California native garden but also an edible one and since I can't plant in the ground I was thus limited to containers.  I decided to have some raised garden beds that I found reasonably priced at Ikea.  I also had some Woolly Pockets, a beige Greenbo railing planter and a pair of green metal chairs from my old place that I wanted to reuse.  I also want to try making a succulent pillow as a fun accent in the garden. Another cool feature that I am really excited about is being able to compost. I found this really neat worm composting system from this Etsy shop.  What I like about this system is that it is not made of plastic and looks decorative.

In regards to a color scheme I wanted to do something different than the interior of my space which consists of more reds, greens and browns.  The existing chairs are green (my favorite color) and the flowers will be a mixture of blue, purple, yellow and white.  I also found really cool green/white/blue outdoor pillows at home goods along with some cool decorative accents.

The idea is to plant natives in the raised beds and edibles in everything else.  Some of plants I intend on using are:

  • Lettuce 
  • Spinach
  • Parsley
  • Cilantro
  • Green onion
  • Dudleya in various speicies
  • Salvia clevelandii 'Japutal' - Japutal Cleveland Sage (purple flower)
  • Frageria californica - Woodland Strawberry (white flower)
  • Berlandiera lyrata - Chocolate Daisy (yellow flower)
  • Ceanothus thyrsiflorus 'Skylark' - Skylark Ceanothus (cobalt blue flower)
In regards to budget...  I knew that I would spend at least $500 on the materials but do not want to go over a thousand.  If you think that spending a up to a thousand is too much, it's actually not when you consider quality.  I could have bought a cheap plastic worm composter but plastic is really harmful to the environment and looks cheap.  The next phase is to purchase all the materials and begin assembly. I am going to buy everything but the plants and get them in place and take one last look to make sure that my plant palette works with my end goal in mind.  Stay tuned as I post updates on my garden transformation.  

Sunday, July 6, 2008

COMPOSTING

Composting is like cooking. There is the simple recipe that has several variations.

"A good beginners guide is to use roughly half brown and half green materials when building your pile."

There are three types of composting
  • Hot Composting
  • Slow Composting
  • Closed Air Composting
(The information below was taken from http://www.burrtecdesert.com/page63.html)

Hot Composting

The hot compost method depends on heat-loving and heat-generating bacteria. In order for these bacteria to thrive, the pile should be of correct size, have the proper temperature, and have the proper balance of food, water and air. The compost pile is really a teeming microbial farm. Microorganisms, such as bacteria and fungi, are naturally present on food and yard trimmings added to the pile. These organisms decompose organic material into rich, earthy-smelling organic material. The hot compost method depends on heat-loving and heat-generating bacteria. In order for these bacteria to thrive, the pile should be of correct size, have the proper temperature, and have the proper balance of food, water and air. If these conditions are met, the microorganisms will raise the temperature of the pile to 140 degrees or more; hot enough to burn your hand! The heat from this rapid decomposition is enough to kill most weeds and disease-causing organisms.

Proper Balance of Food
Just about anything that was once alive can be composted. Carbon and nitrogen from the cells of dead plants and microorganisms fuel the activity of the decomposing organisms. The ratio of carbon to nitrogen (C:N) is important to a hot compost pile. It helps to think of materials high in nitrogen as "greens," and carbon-rich materials as "browns." A good guide to get the right balance of greens to browns is to use roughly half browns and half greens when building your pile. A pile that is too high in browns will stay cool and sit a long time without breaking down. A pile too high in greens can get slimy and have a foul odor. Other household organic materials such as wool, cotton, dust, hair clippings, and pet fur can also be composted.

Materials Not To Use...

  • Food scraps of any kind
  • Large branches or logs (unless shredded)
  • Plastic or synthetic fibers
  • Manure from carnivorous (meat eating) animals
  • Diseased plants or plants suffering from severe insect attack
  • Weeds with seeds
  • Invasive plants and weeds (ivy, succulents, Bermuda grass, morning glory)
  • Plants that have been treated with herbicidesCharcoal ashes
Building The Compost Pile
  • Locate the compost pile in a shady location out of the wind to decrease water loss through evaporation. Multiple piles are recommended for different stages of composting.
  • Stockpile enough green and brown materials to make a pile that is at least one cubic yard in size. Piles smaller than 3 cubed feet will have trouble holding heat, while piles larger than 5 cubed feet will not allow enough air to reach microorganisms at the center.
  • The more surface area the microorganisms have to work on, the faster the materials will decompose. Cut or bruise yard trimmings with a shovel or machete, or put them through a chipper or shredder. Some materials may be run over with a rotary lawn mower. The harder or more woody the tissues, the smaller they need to be chopped.
    Alternate layers of green and brown materials. Begin with a thick layer of coarse, bulky material, such as sunflower stalks or flowers, to allow air to circulate in the pile. Next, layer greens and browns in the mix together. It is best to keep the layers thin. Continue mixing greens and browns until the pile reaches 3-4 feet high. Once the pile starts to "cook," do not add more materials.
Keep the pile moist
The compost material should be moist to the touch, but only yield a drop or two of liquid when squeezed. Moisten dry materials when adding them to the pile. A layer of straw, plastic or carpet scraps on top of the pile helps keep its outer edges moist.

Turn the pile
Ideally, the compost should cook along at 140 degrees of higher for at least three days. (Long thermometers are available to keep track of compost temperature.) When the pile cools, turn it. If a movable compost bin is being used, remove it from the pile, place it nearby, and move the compost into it with a shovel or pitchfork. If a multiple bin unit is being used, move the compost into the next bin. In several days, the pile will heat up a second time, though probably not as high the initial temperature build-up. After the pile has cooled again, it should be turned a third time. As you turn it, move any un-composted materials to the active center of the pile. Continue this process until the compost no longer heats up significantly. When most of the bulky material has decomposed, the compost is ready. Sift large chunks out of the finished compost for further composting.


Slow Composting

In the slow composting method, yard trimmings are composted in simple holding units or compost heaps. Bacteria and fungi that function at mild temperatures are the actors here. Earthworms, centipedes, beetles, millipedes and other organisms are also involved in the breakdown process.

Materials to Use
Use the same ingredients as the hot compost pile. Be sure to keep the kitchen scraps out as compost heaps can attract rodents.

Building the Compost Heap
Position the compost heap in a convenient spot out of the wind and direct sunlight. It is helpful to have two heaps; one to use for fresh materials while the other is maturing. Composting piles should be located directly on the soil.Add yard trimmings as they are collected. By mixing the green and brown materials, and keeping the heap damp (but not soggy), it will help keep the composting process going. Since materials are continually added to the heap, the more finished compost will be located at the bottom. To harvest the ready compost, remove the holding unit from the compost heap, and place it next to the heap. Next, shovel materials from the top of the old heap into the bottom of the empty holding unit until rich compost is found.


Closed Air Composting

Closed air (anaerobic) composting is done in a closed bin. Anaerobic microorganisms, which produce end products that can smell like rotting eggs, also become involved in the decomposition process. In closed air bins, water is continuously recycled as condensation, which drops back to the mass from the interior of the lid. This process helps the contents of the bin stay damp, a good feature given the Coachella Valley's dry climate. Materials to use is the same ingredients as the hot compost pile; with closed-air composting. However, kitchen scraps can be added. Do not add meat, bones, oils, fatty foods or dairy products.

The Closed-Air Composting System
Position the compost bin in a sunny spot if possible, to utilize the "glass house effect," which in turn encourages the entry, but not the loss of heat. It is best to have two composting bins; while the first is maturing, the second can be filled.Bins should be placed on soil that will allow drainage and the entry of earthworms and other beneficial organisms. Some closed-air systems require the bin to be placed over a hole 6-12 inches deep. Chop or grind large kitchen scraps and yard trimmings into smaller pieces, to hasten the composting process.Add materials to the compost bin once or twice a week. Try to avoid more frequent opening of the bin, and keep the lid tightly secured. Vary the layers of material, or mix them together when adding to the bin.It is very important that the compost material does not dry out. Add water, if necessary, to keep the compost moist. If the compost becomes sloppy, add dry ingredients to the mixture. You do not need to turn or aerate the contents of the bin.οΎ  Continue adding materials to the bin until it is full. The materials will reduce significantly in volume as the composting process takes place. When the bin is completely full, cover the compost with a thin layer of soil and allow it to sit for 12-16 weeks. The compost on the bottom of the pile will mature first. Some bins have a bottom opening to harvest this finished compost, while others require the bin to be pulled up over the mature compost.

If you are not into any of these methods of composting than check out Naturemill which is a company that makes a composting machine. It's safe, easy and good for those that have little to no hard space.